Engineering has always recognized the existence of imperfections and working with tolerances. Tolerance is the term that defines the degree of acceptance before imperfection. Thus, any tolerance should only be defined for a certain application, process and material used.
Imperfections are known as any difference regarding the project of the structure. They are inevitable in engineering, but not all of them should be treated as unacceptable.
This article deals with such deviations in relation to welds.
What are the major categories of weld imperfections?
The imperfections generated in welding can be grouped into three categories:
- Dimensional Imperfections
- In the weld
- In the play
- Discontinuities
- Imperfections in material properties
This article will address the imperfections treated as discontinuities and contains 10 common imperfections.
What are weld discontinuities?
Discontinuity is an interruption in the typical physical structure of a material that sharply changes its properties. Thus, the simple variation of properties does not characterize a discontinuity. However, only discontinuities that exceed the tolerance limit should be considered as welding defects.
Thus, a weld with a particular crack can be considered approved or disapproved for different applications.
What are common weld defects?
Among the discontinuities related to the welding process, one can mention 10 types:
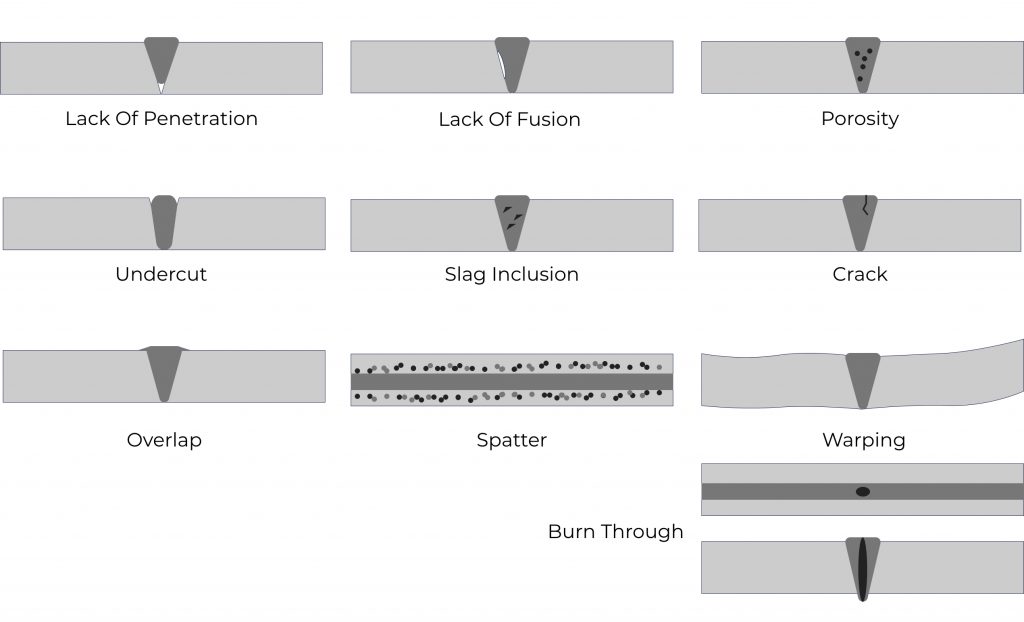
- Lack Of Penetration or Incomplete Penetration
- Lack Of Fusion or Incomplete Fusion
- Undercut
- Spatter
- Slag Inclusions
- Cracks
- Porosity
- Overlap
- Warpage
- Burn Through
1. Type: Lack Of Penetration
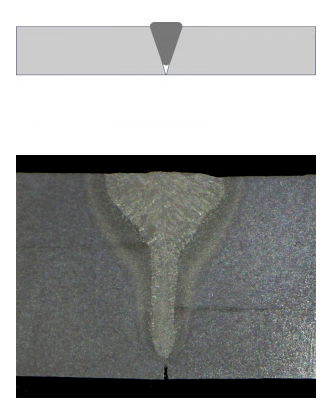
Incomplete Penetration occurs when the root of the weld bead does not reach the root of the joint to weld the opposite surface in the part. To correct this discontinuity, you can increase the current, decrease the welding speed, or change the joint geometry.
2. Type: Lack Of Fusion
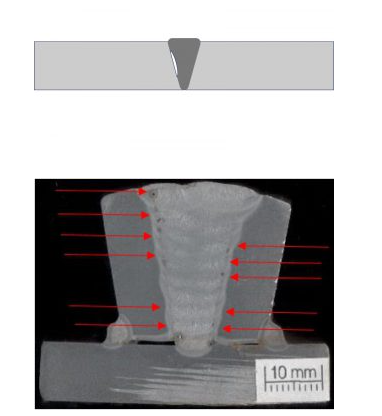
Incomplete Fusion occurs with localized lack of fusion, either at the joint edge or at the face of the previously deposited strand. To correct this discontinuity, you can increase the current, decrease the welding speed, change the joint geometry or use some artifice to avoid magnetic blowing.
3. Type: Undercut
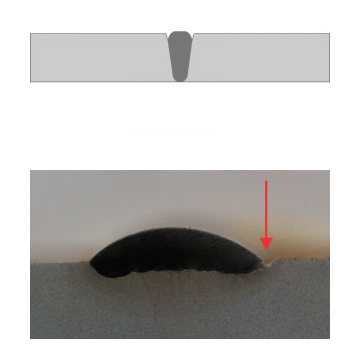
It occurs with a depression, as a notch, at the foot of the cord. To correct this discontinuity, you can reduce the current or reduce the welding speed.
4. Type: Spatter
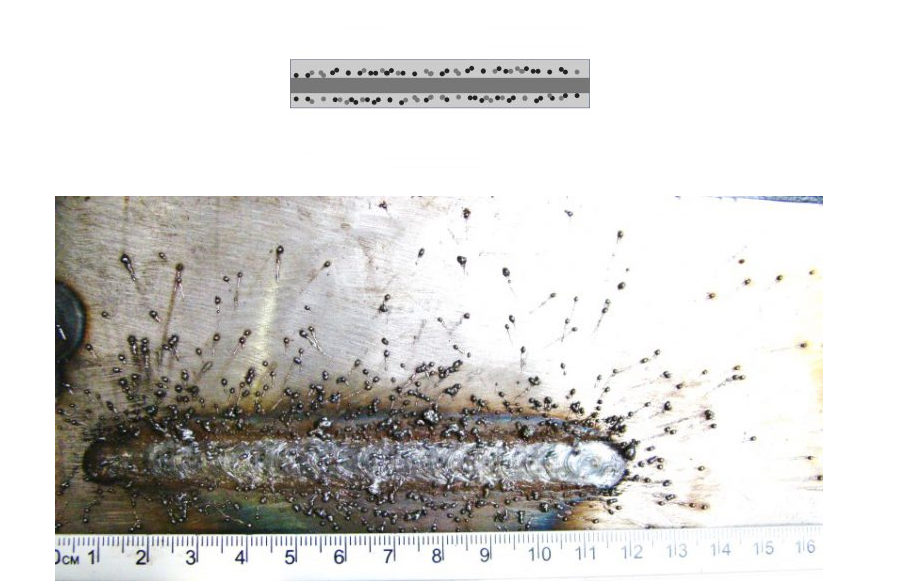
Spatter occurs with the projection of molten particles from the weld bead. To correct this discontinuity, one can reduce the current and control the instability in the metal transfer.
5. Type: Slag Inclusion

It occurs with the retention of solid materials, metallic or not, within the weld metal. Causes are inadequate cleaning of weld surface between passes. It can also occur in single pass welds when slag gets trapped in the root and toes of the weld.
6. Type: Cracks

Among the discontinuities of metallurgical origin, one can mention cracks, which may appear in the zone affected by the weld (Fused Zone or Heat Affected Zone) due to several factors, such as the contraction of the solidifying metal and the growth of grains, and can be classified as cold cracks, solidification cracks and reheating cracks.
7. Type: Porosity
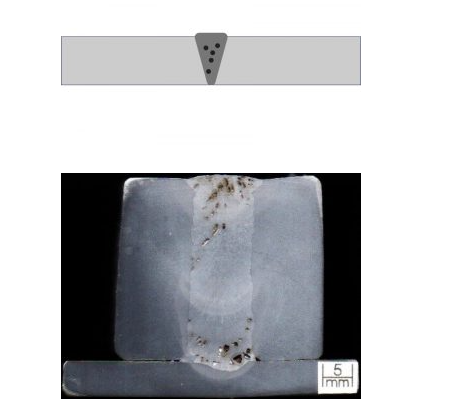
It occurs with the formation of gas bubbles retained within the melt zone. It can occur internally and also surfacing on the surface. To correct this discontinuity, it is possible to correct the flow of the protection gas and to use gases of better quality (with greater purity in its composition).
8. Type: Overlap

Overlap occurs when the weld face extends far over the weld toe. This is mostly caused by using too large electrodes or having a bad welding technique.
9. Type: Warpage
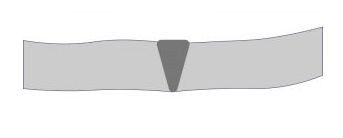
Warpage is an unwanted change in the shape and position of the metal parts. It happens when the heat usage is wrong and is caused by the contraction/expansion of the welded parts.
10. Type: Burn Through
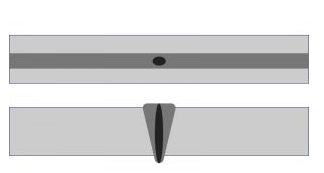
If the weld metal penetrates the base parts we talk about burn through. This is a common discontinuity when welding thin parts. It happens when the root opening is too large or too much voltage is used.
How to find weld defects?
Non-Destructive Testing (NDT)!
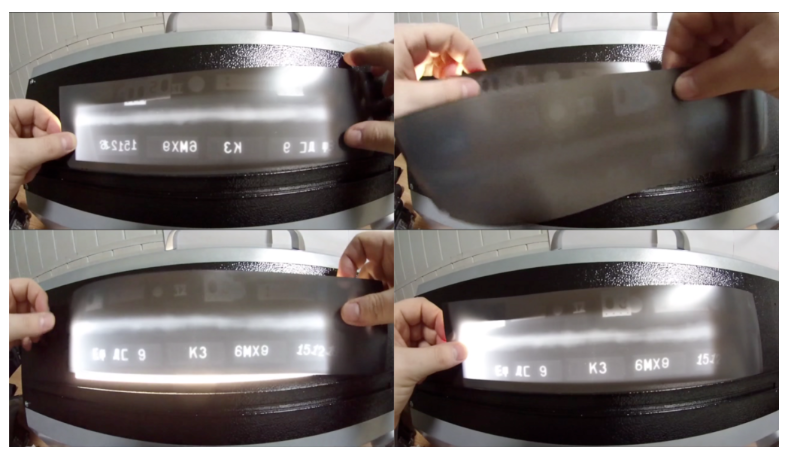
With the purpose of approving a weld, several techniques are carried out to find out and prove the absence of defects that put the welded structure at risk. Unlike destructive tests (DT), non-destructive tests (NDT) aim at the possibility of observing discontinuities without compromising the welded part, being carried out in the stages of manufacture, construction, assembly and maintenance.
Non-Destructive Testing contributes to the monitoring of the quality of goods and services, cost reduction, preservation of life and the environment, being a competitive factor for the companies that use them. In addition to being a fundamental piece to guide studies whose main objective is to increase the reliability indexes of industrial equipment.
When properly applied, NDTs provide great returns by saving time, reducing equipment failure rates, increasing diagnostic assertiveness and increasing the overall quality of industrial equipment reliability.
Some NDTs, as they involve complex signal and image analysis, become an extremely complex process and difficult to be understood by inexperienced operators.Rafael Gomes Nunes Silva – Arc and LASER Welding Researcher
Example: Ultrasonic Testing – Phased Array
In conventional UT testing, a single transducer sends ultrasonic waves into the material. Phased Array probes contain multiple transducers. By introducing a delay between the pulses sent out by each transducer, the beam angle, focal point and focal spot of the generated wave front can be influenced.
Phased Array Ultrasonic Testing is an advanced application. It can be used for weld inspections, crack and flaw detections, thickness measurements and corrosion inspections. This technique can also be used for real-time analyses of the welds.
Because of the detailed visualization of the defect size, shape, depth and orientation, Phased Array can often be used instead of Radiographic Testing. Since it doesn’t use ionizing radiation, there is no need to create a safety zone which usually means interrupting production.
What is the future of welding and NDT and NDE?
Welding and NDT can benefit from digitalization and new technologies. Combining Computer Vision, Robotics and Artificial Intelligence, they provide not only confidence in the inspection process, but also agility with multiple inspections and versatility in several welding processes, checking the presence of components, classifying defects and automating the corrective actions of the welding process.


