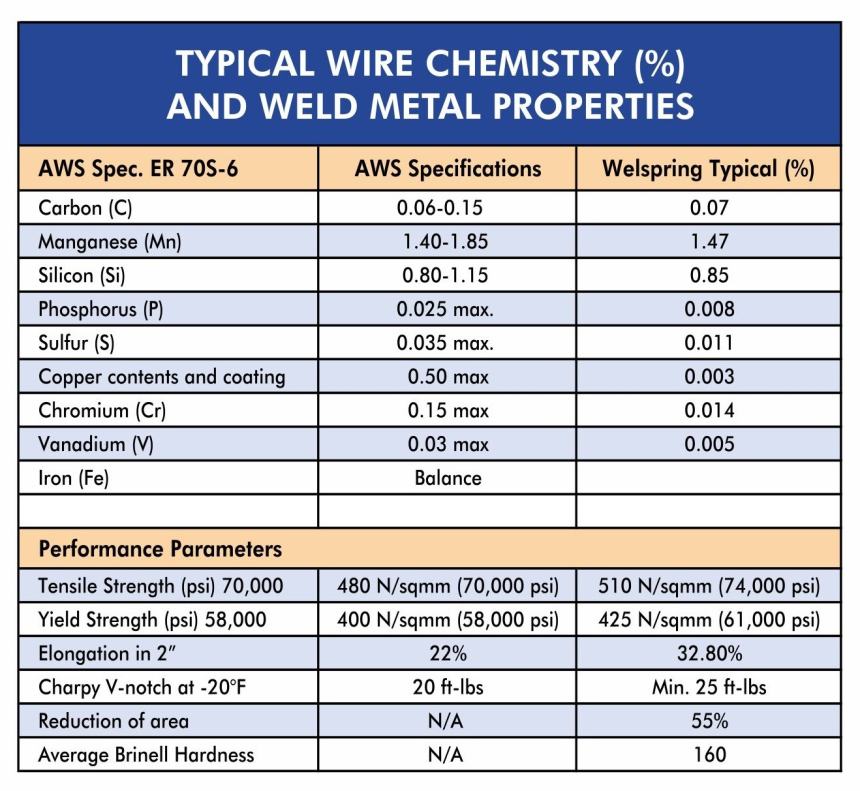
A MIG welding wire speed chart offers insights into appropriate wire speeds for various material thicknesses and types in MIG welding. It aids in the optimal setting of your MIG welder for effective, high-quality welds.
Table of Wire Speed for MIG Welding
| Material Thickness (in) | Amperage (A) | Wire Speed (ipm) |
|---|---|---|
| 0.024 | 30-40 | 100-120 |
| 0.031 | 40-70 | 120-150 |
| 0.062 | 70-120 | 150-200 |
| 0.125 | 120-170 | 200-250 |
| 0.187 | 170-220 | 250-300 |
| 0.250 | 220-270 | 300-350 |
This table is a general guide; actual settings can vary based on specific conditions, welding machine, and type of wire used.

What Impacts MIG Welding Wire Speed?
Several factors influence the speed of the MIG welding wire. Material thickness is a primary factor – the thicker the material, the higher the wire speed and amperage setting required. The type of metal (e.g., stainless steel, mild steel) and wire (e.g., solid wire, flux cored wire) also affects the wire speed. Lastly, the welding position and your own welding technique can alter optimal settings.
From my years of experience, these variables make every welding job unique. A slight change in any of them can significantly affect the quality of your weld, so always keep them in mind when adjusting your wire speed.
Mild Steel
This is the most commonly welded metal and often used as a benchmark for setting the wire speed in MIG welding. Mild steel has a relatively lower melting point than other metals, which usually requires a moderate wire speed.
Stainless Steel
Stainless steel has a higher melting point than mild steel. Consequently, it generally requires a lower wire speed to maintain a steady, controlled weld pool and prevent burn-through.
Aluminum
Aluminum conducts heat very effectively and has a lower melting point, leading to its base metal heating up quickly during welding. This requires a higher wire speed to compensate for the quick heating and melting, often making aluminum more challenging to weld than steel.
How to Set the Wire Speed for MIG Welding?
Setting the wire speed for MIG welding involves understanding the correlation between wire speed, voltage, and amperage. A higher wire speed requires a higher voltage to maintain a stable arc.
Consult your MIG welder’s chart for a rough guide on wire feed speed and voltage settings according to material thickness. From there, it’s fine-tuning based on your specific scenario and welder’s feel. A too slow wire speed might result in a weak weld, while a too fast speed may cause the wire to burn back towards the contact tip.

Wire Speeds for Common Welding Scenarios
| Welding Scenario | Material Type | Material Thickness (in) | Amperage (A) | Wire Speed (ipm) |
|---|---|---|---|---|
| Lap Joint | Mild Steel | 0.125 | 130-160 | 200-250 |
| Butt Weld | Mild Steel | 0.062 | 70-110 | 150-200 |
| Vertical Welding | Mild Steel | 0.187 | 150-190 | 200-240 |
| Overhead Welding | Mild Steel | 0.250 | 210-250 | 250-300 |
| Welding Thin Sheet | Stainless Steel | 0.031 | 40-70 | 120-150 |
| Lap Joint | Aluminum | 0.125 | 130-170 | 240-290 |
| Butt Weld | Aluminum | 0.062 | 90-130 | 200-250 |
- Welding Thin Material: You’ll need lower wire speeds when welding thin materials like sheet metal. It prevents the risk of burn-through.
- Welding Thick Material: A higher wire speed is required to achieve good penetration for welding thicker materials.
- Vertical Welding: A slower wire speed helps prevent the weld pool from sagging when welding vertically.
In my own experience, welding stainless steel requires a particularly fine balance. It’s less forgiving than mild steel and needs careful wire speed adjustment to get just the right penetration without burning through.
How to Control the Wire Speed on a MIG Welding Machine
Most MIG welders come with a wire feed speed dial. This knob or button allows you to increase or decrease the speed at which the wire is fed into the weld joint.
If you’re new to welding, start with your machine’s suggested settings and make incremental adjustments. Be sure to practice on some scrap metal first. Over time, you’ll understand how adjustments affect your weld quality.
Tips for Selecting the Correct MIG Welding Wire Speed
- Use a Welding Calculator: A welding calculator is a valuable tool for beginners. It calculates appropriate settings based on the type of metal, thickness, and wire type.
- Practice on Scrap Material: Before starting your project, practice on a scrap piece of the same material. This way, you can fine-tune your settings without affecting your project.
- Listen to Your Weld: A good weld sounds like sizzling bacon. If it pops and spatters, your wire speed might be too high.
Some welding machines give you a wire speed in terms of 1,2,3 out of 10. This will relate to a specific inches per minute speed. It is good to understand what your particular welding machine uses so when you move from machine t machine you can adjust more asily.
As an experienced welder, I’ve learned that there’s a certain art to selecting the correct wire speed. It takes practice, patience, and willingness to make and learn from mistakes.
Conclusion
Understanding your MIG welding wire speed chart and how to manipulate the wire speed according to your welding scenario is key to achieving high-quality welds. Whether you’re a novice or a seasoned welder, the chart, combined with your experience and judgment, is an indispensable tool.
Remember, practice makes perfect, and every piece of metal has a story to tell.


